
Preparing artwork for a professional printer? Knowing how to save images as TIFF for print quality matters more than most people realize. JPG works for the web, but commercial printing demands TIFF’s lossless precision. Your prints stay crisp from billboards to brochures.
This guide explains why TIFF dominates print workflows, walks through the easiest conversion method, and shares pro tips for press-ready files. By the end, you’ll handle commercial print jobs with confidence.
Why Printers Demand TIFF Over JPG
JPG uses lossy compression. Tiny details vanish to save space. That works fine on screens, but print magnifies every flaw. Commercial presses use 300+ DPI resolutions, exposing artifacts that JPG hides at smaller scales.
Furthermore, TIFF supports CMYK color profiles. Commercial printers print using cyan, magenta, yellow, and black inks. RGB JPGs cause color shifts during press conversion. TIFF lets you embed the exact print-ready profile upfront.
When TIFF Becomes Essential
- Submitting designs to commercial print shops
- Preparing magazine and book layouts
- Creating press-ready brochures and flyers
- Producing large format prints like banners
- Archiving photographs for long-term preservation
- Handing off final art to printing professionals
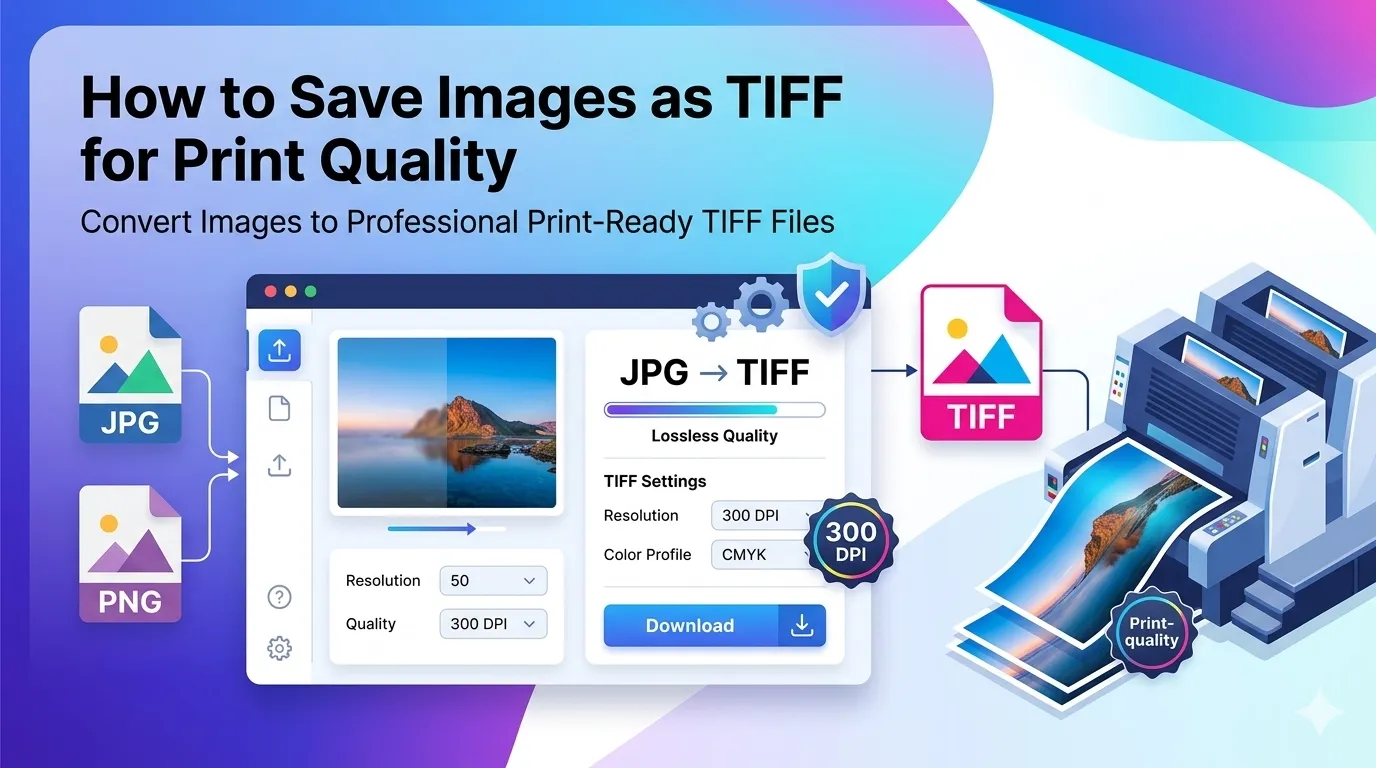
Step-by-Step: Convert Images to TIFF Online
Browser-based tools handle TIFF conversion in seconds. No expensive Photoshop license needed for casual print prep. Here’s the simplest workflow.
Step 1: Upload Your Source Images
Visit our Image to TIFF converter. Drag photos into the upload zone. The tool accepts JPG, PNG, BMP, and most common formats.
Step 2: Choose Compression Method
TIFF supports lossless LZW compression or no compression. LZW shrinks files without quality loss. Uncompressed TIFFs run massive but guarantee zero changes. Both work for professional printing.
Step 3: Download Print-Ready TIFFs
Save the converted files individually or as a ZIP. Submit them to your print shop or include them in InDesign layouts. The high-quality results stay crisp at any print size.
TIFF vs JPG vs PNG: Print Comparison
| Format | Print Quality | File Size |
|---|---|---|
| TIFF | Excellent, lossless | Large |
| PNG | Good for graphics | Medium |
| JPG | Variable, lossy | Small |
| Professional | Variable | |
| RAW | Maximum detail | Very large |
Resolution Requirements for Print
Print resolution differs from web display. Web images work fine at 72 DPI. Print demands 300 DPI minimum for sharp results. Bigger prints sometimes need even higher.
A 4×6 inch print at 300 DPI needs an image that’s 1200×1800 pixels minimum. Letter-size prints (8.5×11) need 2550×3300 pixels. Bigger formats scale up proportionally. Match resolution to final size before converting.
Tips for Press-Ready TIFF Files
Smart preparation saves expensive reprints. First, start with the highest-resolution source. Upscaling small images for print introduces blur and pixelation that no compression can hide.
Second, embed the right color profile. CMYK profiles match printing inks. Adobe RGB suits broader color reproduction. Third, save with 8 or 16 bits per channel. 16-bit files capture more subtle gradients for premium prints.
Common TIFF Issues to Avoid
- Wrong color space: Convert RGB to CMYK before print submission
- Low resolution upscaling: Start with print-quality originals
- Large file uploads failing: Use TIFF compression like LZW
- Missing color profiles: Embed the right ICC profile during conversion
- Transparent backgrounds in print: Flatten transparency before submission
Storage and Workflow Considerations
TIFF files run massive. A high-resolution photograph can weigh 50-100 MB easily. Plan storage carefully when working on print campaigns with many images. Cloud sync slows under heavy TIFF loads.
For backup and transfer, use external SSDs or fast network storage. Many print shops accept large file deliveries via WeTransfer or Dropbox. Pre-bundle TIFFs into ZIP archives for cleaner handoffs.
Privacy When Converting Brand Assets
Brand visuals and print artwork carry significant proprietary value. Pick TIFF converters processing files in your browser. Assets stay on your device throughout, protecting unreleased campaign visuals.
Read each tool’s privacy policy first. Reputable services delete uploads within an hour. Avoid platforms requiring account creation for one-off conversions of confidential design files.
Combining TIFF With Other Tools
TIFF integrates into broader workflows. Resize before converting using our Image Resizer for the right print dimensions. For final delivery via PDF, route through our Image to PDF converter.
Need web copies after print work? Switch back to our Image to JPG converter for web-friendly versions. Each tool handles a specific job in the design pipeline.
When TIFF Isn’t Necessary
TIFF wastes space for web use. Websites never need TIFF. Email attachments balloon. Cloud storage costs climb fast with TIFF libraries. Use TIFF only when print or archival quality genuinely matters.
Reserve TIFF for press-ready deliverables and long-term archives. Pick JPG, WebP, or PNG for web display, email, and digital sharing. Match format to actual destination rather than defaulting to TIFF everywhere.
Deliver Print-Quality Files Every Time
Commercial printing demands more than web-quality files. TIFF delivers the precision and color accuracy your final prints need. With the right tool, converting takes seconds and protects your design investment from press surprises.
Try our Image to TIFF converter today. Free, secure, and ready whenever your work needs to travel as professional press-ready files.